
We assumed you already installed LEMP on your server; you can click HERE for instructions on how to install LEMP.
Step 1- Creating Database and User for WordPress
Login to the MySQL and create the database using the command below
root@testserver:~# mysqlmysql> CREATE DATABASE MY_wordpress DEFAULT CHARACTER SET utf8 COLLATE utf8_unicode_ci;
Query OK, 1 row affected, 2 warnings (0.00 sec)
The database name, “MY_wordpress,” you can use your preferred database name
Now, we will make the database user and assign the database privileges to the user.
mysql> CREATE USER 'My_wordpress_User'@'localhost' IDENTIFIED BY 'typeyourpasswordhere';

Query OK, 1 row affected, 2 warnings (0.00 sec)


mysql> GRANT ALL ON MY_wordpress.* TO 'My_wordpress_User'@'localhost';
You have completed the database to exist Mysql type “exit;”
Step 2- INSTALLATION OF PHP EXTENSIONS
WordPress requires some php extension to function; use the command below to install the extensions.
root@testserver:~#apt install php-curl php-gd php-intl php-mbstring php-soap php-xml php-xmlrpc php-zipRestart the PHP-FPM
root@testserver:~# systemctl restart php7.4-fpmSTEP 3 – CONFIGURE NGINX BLOCKS
Create a directory for your domain name using the command below
root@testserver:~# mkdir /var/www/testdomain.com
Create a configuration file with your domain name using the command below
root@testserver:~#
 nano /etc/nginx/sites-available/testdomain.com
server {
server_name testdomain.com www.testdomain.com;
root /var/www/testdomain.com;
index index.html index.htm index.php;
location / {
#try_files $uri $uri/ =404;
try_files $uri $uri/ /index.php$is_args$args;
}
location = /favicon.ico { log_not_found off; access_log off; }
location = /robots.txt { log_not_found off; access_log off; allow all; }
location ~* \.(css|gif|ico|jpeg|jpg|js|png)$ {
expires max;
log_not_found off;
}
location ~ \.php$ {
include snippets/fastcgi-php.conf;
fastcgi_pass unix:/var/run/php/php7.4-fpm.sock;
}Then, run the command below to check if the configuration is okay; if you encounter an error, please check the code scrutiny.
root@testserver:~#
 nginx -t
nginx: the configuration file /etc/nginx/nginx.conf syntax is ok
nginx: configuration file /etc/nginx/nginx.conf test is successful
If no errors were reported, reload Nginx by typing:
root@testserver:~# systemctl reload nginxSTEP 4 – DOWNLOADING AND INSTALLATION OF WORDPRESS
Change into a writeable directory
root@testserver:~#cd /tmpThen, download the WordPress zipped file using the command;
root@testserver:~#curl -LO https://wordpress.org/latest.tar.gzExtract the files;
root@testserver:~#tar xzvf latest.tar.gzCopy over the sample configuration file to the filename that WordPress reads:
root@testserver:~#cp /tmp/wordpress/wp-config-sample.php /tmp/wordpress/wp-config.phpLet’s copy the entire contents of the directory into our document root
root@testserver:~#cp -a /tmp/wordpress/. /var/www/testdomain.comNow that our files are set up, we must give the “www-data user and group ownership.” Nginx will need to be able to read and write WordPress files to serve the website
root@testserver:~# chown -R www-data:www-data /var/www/testdomain.comNow, let’s update the wp-config.php database parameters using the details created in Step 1.
root@testserver:~# nano /var/www/wordpress/wp-config.php
define( 'DB_NAME', 'My_wordpress_User' );

/** MySQL database username */
define( 'DB_USER', 'My_wordpress_User' );

/** MySQL database password */
define( 'DB_PASSWORD', 'typeyourpasswordhere' );
Now, visit the link below and copy all the keys
: https://api.wordpress.org/secret-key/1.1/salt/
Sample of the output;
define('AUTH_KEY',         '+*,kT--h.,3#tq|64V>/?;z<vn8CxHqk|U%g.{Ogd6|?u-3wKW|1Qgw!Og{wzbpQ');
define('SECURE_AUTH_KEY',  '|g-`>QC*q$g.B>]gmyO3T^QqE(QgB4|Yg7}<E6|rtmO|S-X`lk3[ClMRO4SF`y|+');
define('LOGGED_IN_KEY',    'A8yU+M!RO6L4:Xcj.*6gs`07Z~mK#UQ+.[6bMwy7B;e#%ovMf8>xkeL+ff!)T3tL');
define('NONCE_KEY',        'Z.#<ns~7qwC|zRs+*)S#vm 7YM_9jY~wB{22Ci%V,PSP2~ho7 bqO--|/U{Dzwmp');
define('AUTH_SALT',        'ly1cH@Iq)ER!VS0l2qH@C2);7ZiKG&-jh($Ah[LO;}eBe/0KdioP%nE0|.pj_{7U');
define('SECURE_AUTH_SALT', '5D-)12-b-$BH2oV[e[5|N<sd=!2&>xHR:U<i|y|0$ySc{FdrV%8s7E;>Pt*7|5k[');
define('LOGGED_IN_SALT',   'o<4HRjsd2O9%>W{jzuqa[Ew9quVDz+O?)I_{J0x(?r.a4%-J<PU:;+[L3I)d]p+%');
define('NONCE_SALT',       'PHC:YAu5Aw9I4bfm(K-LabgU!qTX(*r>Jv:|f-^RaA#Gm2D8 mtH{a;?=A;MIz}K');
Now, open the wp-config.php file, delete the dummy values (Sample below), and insert the generated key into that field.
root@testserver:~# nano /var/www/wordpress/wp-config.php
==================
define('AUTH_KEY', 'put your unique phrase here');
define('SECURE_AUTH_KEY', 'put your unique phrase here');
define('LOGGED_IN_KEY', 'put your unique phrase here');
define('NONCE_KEY', 'put your unique phrase here');
define('AUTH_SALT', 'put your unique phrase here');
define('SECURE_AUTH_SALT', 'put your unique phrase here');
define('LOGGED_IN_SALT', 'put your unique phrase here');
define('NONCE_SALT', 'put your unique phrase here');
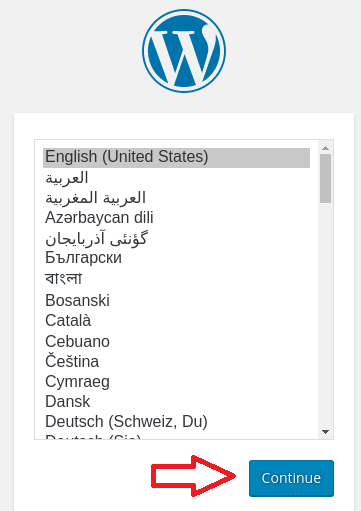
=========Visit the site using the domain name or IP and follow the instructions to complete the installation.
http://testdomain.com or Server IP/
To install free SSL on your domain, click HERE for the instructions.
Leave A Comment?