
INTRODUCTION
A collection of programs known as the LEMP software stack can serve PHP-coded dynamic web pages and web apps. An Nginx (pronounced “Engine-X”) web server runs on the Linux operating system, which is referred to by this abbreviation. PHP does the dynamic processing, while the backend data is kept in a MySQL database.
This tutorial shows you how to set up an LEMP stack on a server running Ubuntu 20.04. The first prerequisite is taken care of by the Ubuntu operating system. We will outline how to activate the remaining components.
STEP 1 – Installation of Nginx Web Server
Update the server Package and then install the nginx
root@testserver:~# apt update
root@testserver:~# apt nginx
Press Y and ENTER to indicate that you wish to install Nginx when requested.
You must permit connections to Nginx if the UFW firewall is activated; upon installation, Nginx establishes several unique UFW application profiles.
Use the command below to check the UFW profile apps that are available
root@testserver:~# ufw app listroot@testserver:~# ufw app list
Available applications:
Nginx Full
Nginx HTTP
Nginx HTTPS
OpenSSH
Here, you will only need to allow regular HTTP traffic on port 80; since you haven’t configured SSL for your server in this guide, you can activate the HTTPS later once you have active SSL.
Enable the HTTP using the command below;
root@testserver:~# ufw allow 'Nginx HTTP'Check the updated status using the following command
root@testserver:~# ufw statusOutput
Status: active
To Action From
-- ------ ----
OpenSSH ALLOW Anywhere
Nginx HTTP ALLOW Anywhere
OpenSSH (v6) ALLOW Anywhere (v6)
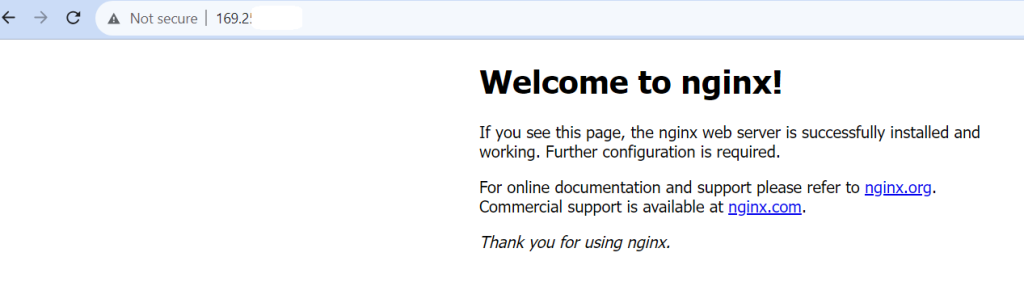
Nginx HTTP (v6) ALLOW Anywhere (v6)You can check if the server is up and operating after implementing the new firewall rule by going to the server’s domain name or public IP address in your web browser.
If you see the page below, it shows you have successfully installed Nginx.
Finally, we need to make www-data (Nginx user) the owner of the web directory. By default, it’s owned by the root user.
STEP 2 – Installation of MySQL
After setting up a web server, you must set up a database management system to store and control your website’s data. A standard database management system used in PHP settings is MySQL.
Run the command below to download and install the MySQL
root@testserver:~# apt install mysql-serverPress Y to accept installation when asked, followed by ENTER.
Running the security script that comes pre-installed with MySQL is advised. This script will lock down access to your database system and remove several unsafe default settings. Run the ensuing command to launch the interactive script:
root@testserver:~# mysql_secure_installationThe command will ask you to enter the MariaDB root password; press Enter as the root password isn’t set yet. Then, enter y to set the root password for the MariaDB server.
The decision to enable this feature is entirely subjective. If enabled, MySQL will reject passwords with an error if they don’t meet the specified criteria. Validation can be stopped without risk, but you should always use secure, one-of-a-kind passwords for database logins.
Next, you can press Enter to answer all remaining questions, which will remove the anonymous user, turn off the remote root login, and remove the test database. This step is an essential requirement for MariaDB database security. (Notice that Y is capitalized, which means it is the default answer. )
By default, a MySQL installation has an anonymous user,
allowing anyone to log into MySQL without having to have
a user account created for them. This is intended only for
testing, and to make the installation go a bit smoother.
You should remove them before moving into a production
environment.

Remove anonymous users? (Press y|Y for Yes, any other key for No) : y
Success.


Normally, root should only be allowed to connect from
'localhost'. This ensures that someone cannot guess at
the root password from the network.

Disallow root login remotely? (Press y|Y for Yes, any other key for No) : y
Success.

By default, MySQL comes with a database named 'test' that
anyone can access. This is also intended only for testing,
and should be removed before moving into a production
environment.


Remove test database and access to it? (Press y|Y for Yes, any other key for No) : y
 - Dropping test database...
Success.

 - Removing privileges on test database...
Success.

Reloading the privilege tables will ensure that all changes
made so far will take effect immediately.

Reload privilege tables now? (Press y|Y for Yes, any other key for No) : y
Success.

All done!
Once you are done, test if you’re able to log in to the MySQL console by typing:
root@tobitestserver:~# mysql
root@tobitestserver:~# mysql
Welcome to the MySQL monitor.  Commands end with ; or \g.
Your MySQL connection id is 12
Server version: 8.0.34-0ubuntu0.20.04.1 (Ubuntu)

Copyright (c) 2000, 2023, Oracle and/or its affiliates.

Oracle is a registered trademark of Oracle Corporation and/or its
affiliates. Other names may be trademarks of their respective
owners.

Type 'help;' or '\h' for help. Type '\c' to clear the current input statement.

mysql>
To exit, run
root@tobitestserver:~# exit;Step 3 – Installation of PHP
We have Nginx installed to run your contents and Mysql to manage and store data; now, we need to install PHP to process codes.
Firstly, You’ll need to install php-fpm and php-mysql, a PHP module that allows PHP to communicate with MySQL-based databases. Core PHP packages will automatically be installed as dependencies.
root@tobitestserver:~# apt install php-fpm php-mysqlWhen prompted, type Y and Enter; you have successfully installed PHP components. Next, you need to configure the nginx to use the PHP components.
Step 4 – Configure Nginx for PHP
We will set up a domain, “testdomain.com,” to ensure you replace that with your actual environment.
By default, Nginx has one server block configured to serve documents from a directory at /var/www/html. But it’s recommended to create another directory structure to avoid difficulties while managing more than one domain name; instead of modifying /var/www/html, we’ll create a directory structure within /var/www for the “testdomain.com” website.
Create a document root for your domain name using the command below;
root@testserver:~# mkdir /var/www/testdomain.com
Assign ownership to the directory with the $USER variable.
root@testserver:~#chown -R $USER:$USER /var/www/testdomain.comOpen a new configuration file in Nginx’s sites-available directory using your preferred command-line editor. Here, we’ll use nano:
root@testserver:~# nano /etc/nginx/sites-available/testdomain.comThen, insert the codes below into the file and update the ‘testdomain.com” to your domain name.
server {
    listen 80;
    server_name your_domain www.testdomain.com;
    root /var/www/testdomain.com;

    index index.html index.htm index.php;

    location / {
        try_files $uri $uri/ =404;
    }

    location ~ \.php$ {
        include snippets/fastcgi-php.conf;
        fastcgi_pass unix:/var/run/php/php7.4-fpm.sock;
     }

    location ~ /\.ht {
        deny all;
    }

}
When you’re done editing, save and close the file. If you’re using nano, you can do so by typing CTRL+X and then y and ENTER to confirm.
Then use the following command to link to the configuration file in Nginx’s sites-enabled directory;
root@testserver:~# ln -s /etc/nginx/sites-available/testdomain.com /etc/nginx/sites-enabled/You can test your configuration for syntax errors by typing:
root@testserver:~# nginx -t
nginx: the configuration file /etc/nginx/nginx.conf syntax is ok
nginx: configuration file /etc/nginx/nginx.conf test is successful
If any errors are displayed, Return to your configuration file and check its contents.
Then unlink the default file with the command below;
root@testserver:~# unlink /etc/nginx/sites-enabled/defaultNow, restart your nginx server;
systemctl reload nginxLet’s create a test index file in the /var/www/testdomain.com/ directory using the command below;
root@testserver:~# nano /var/www/testdomain.com/index.phpInsert the php scripts below, save, and visit the site.
<html>
 <head>
  <title>TEST PAGE</title>
 </head>
 <body>
<center>  <?php echo '<h1>WELCOME TO WEB4AFRICA</h1>'; ?>

<?php echo '<p>We offer the best Virtual Private server</p>'; ?>
<center>
 </body>
</html>
You should have the results below. The page shows Not secure; you can install SSL on the server. Click Here for steps to enable SSL on the domain name.

Congratulations, you have successfully Installed LEMP.
Leave A Comment?